Star Wars: Dark Forces
We will continue our trend of featuring a disproportionate amount of LucasArts games in our guide. The game we’ll tackle next is the Star Wars: Dark Forces demo from 1995, an example of the first-person shooter (FPS) genre that has fast software-rendered 3D graphics.
Global config tweaks
But before we get on with it, let’s improve our global configuration!
Append the following to the [autoexec] section of your primary
configuration:
What does this accomplish?
-
@echo offis a special command; with “echo” disabled, the remaining commands in the[autoexec]section won’t be printed as they are executed when you start DOSBox Staging. The@character at the start of the line ensures theecho offcommand itself is not printed either (you can prefix any command with@, and it won’t be printed when executed). -
Then we set the master volume to 40% on the next line. The
/noshowprevents the mixer from displaying its current state (this is “silent mode”). -
mode rate=32 delay=1makes keyrepeat kick off as soon as possible when you hold down a key, and also sets the fastest repeat rate. -
Finally,
mode 80x43sets the startup screen to display 43 rows instead of the default 25. This is handy when messing around in the command line.
Note
Read the help text of the echo and mode commands (e.g., run mode /?)
and play around with the various options. You can’t break anything — if
something weird happens, just restart DOSBox Staging.
Installing the game
As per our usual routine, we’ll create a new folder in DOS Games called
Dark Forces and the drives/c subfolder in it. The game demo comes in
three ZIP archives,
dforces1.zip,
dforces2.zip,
and dforces3.zip;
we’ll need to copy their contents to our virtual C drive. Make sure to
download the manual as well.
There’s a README.TXT included with the demo; it’s recommended to read at
least the installation and the keyboard shortcuts sections (use more
README.TXT). The instructions tell us exactly what we need to do (this is why
you should always check out the included text files):
I) INSTRUCTIONS FOR INSTALLING AND RUNNING DARK FORCES DEMO:

1. Create a directory for the demo on your hard drive.
   (ex. C:\DFDEMO)

2. Extract the demo using PKUNZIP.EXE into the demo
   directory.  If you have downloaded one or both of
   the cutscene files, then unzip them as well.

3. From the demo directory, type "demo" and  RETURN. This will
   bring you to the install menu. From the install menu, follow
   the on-screen instructions. Press "I" to install. This will
   take you through through the sound card setup program. When
   the install is finished it will bring you to the options
   menu. From there you type "1" to run Dark Forces. In the
   future, in order to get to the options menu, you should
   type "demo" from the your demo directory.
We actually don’t need that DFDEMO folder, and we’ve already extracted the
contents of the three ZIP archives to our root directory on drive C, so just
follow the instructions in step 3. Choose the Express Setup option in the
sound configuration utility by pressing E, and the rest should be
straightforward. The setup program will detect the Sound Blaster 16 correctly
and will even play some test sounds.
After the setup has been completed, start the game by running demo again
and then pressing the 1 key.
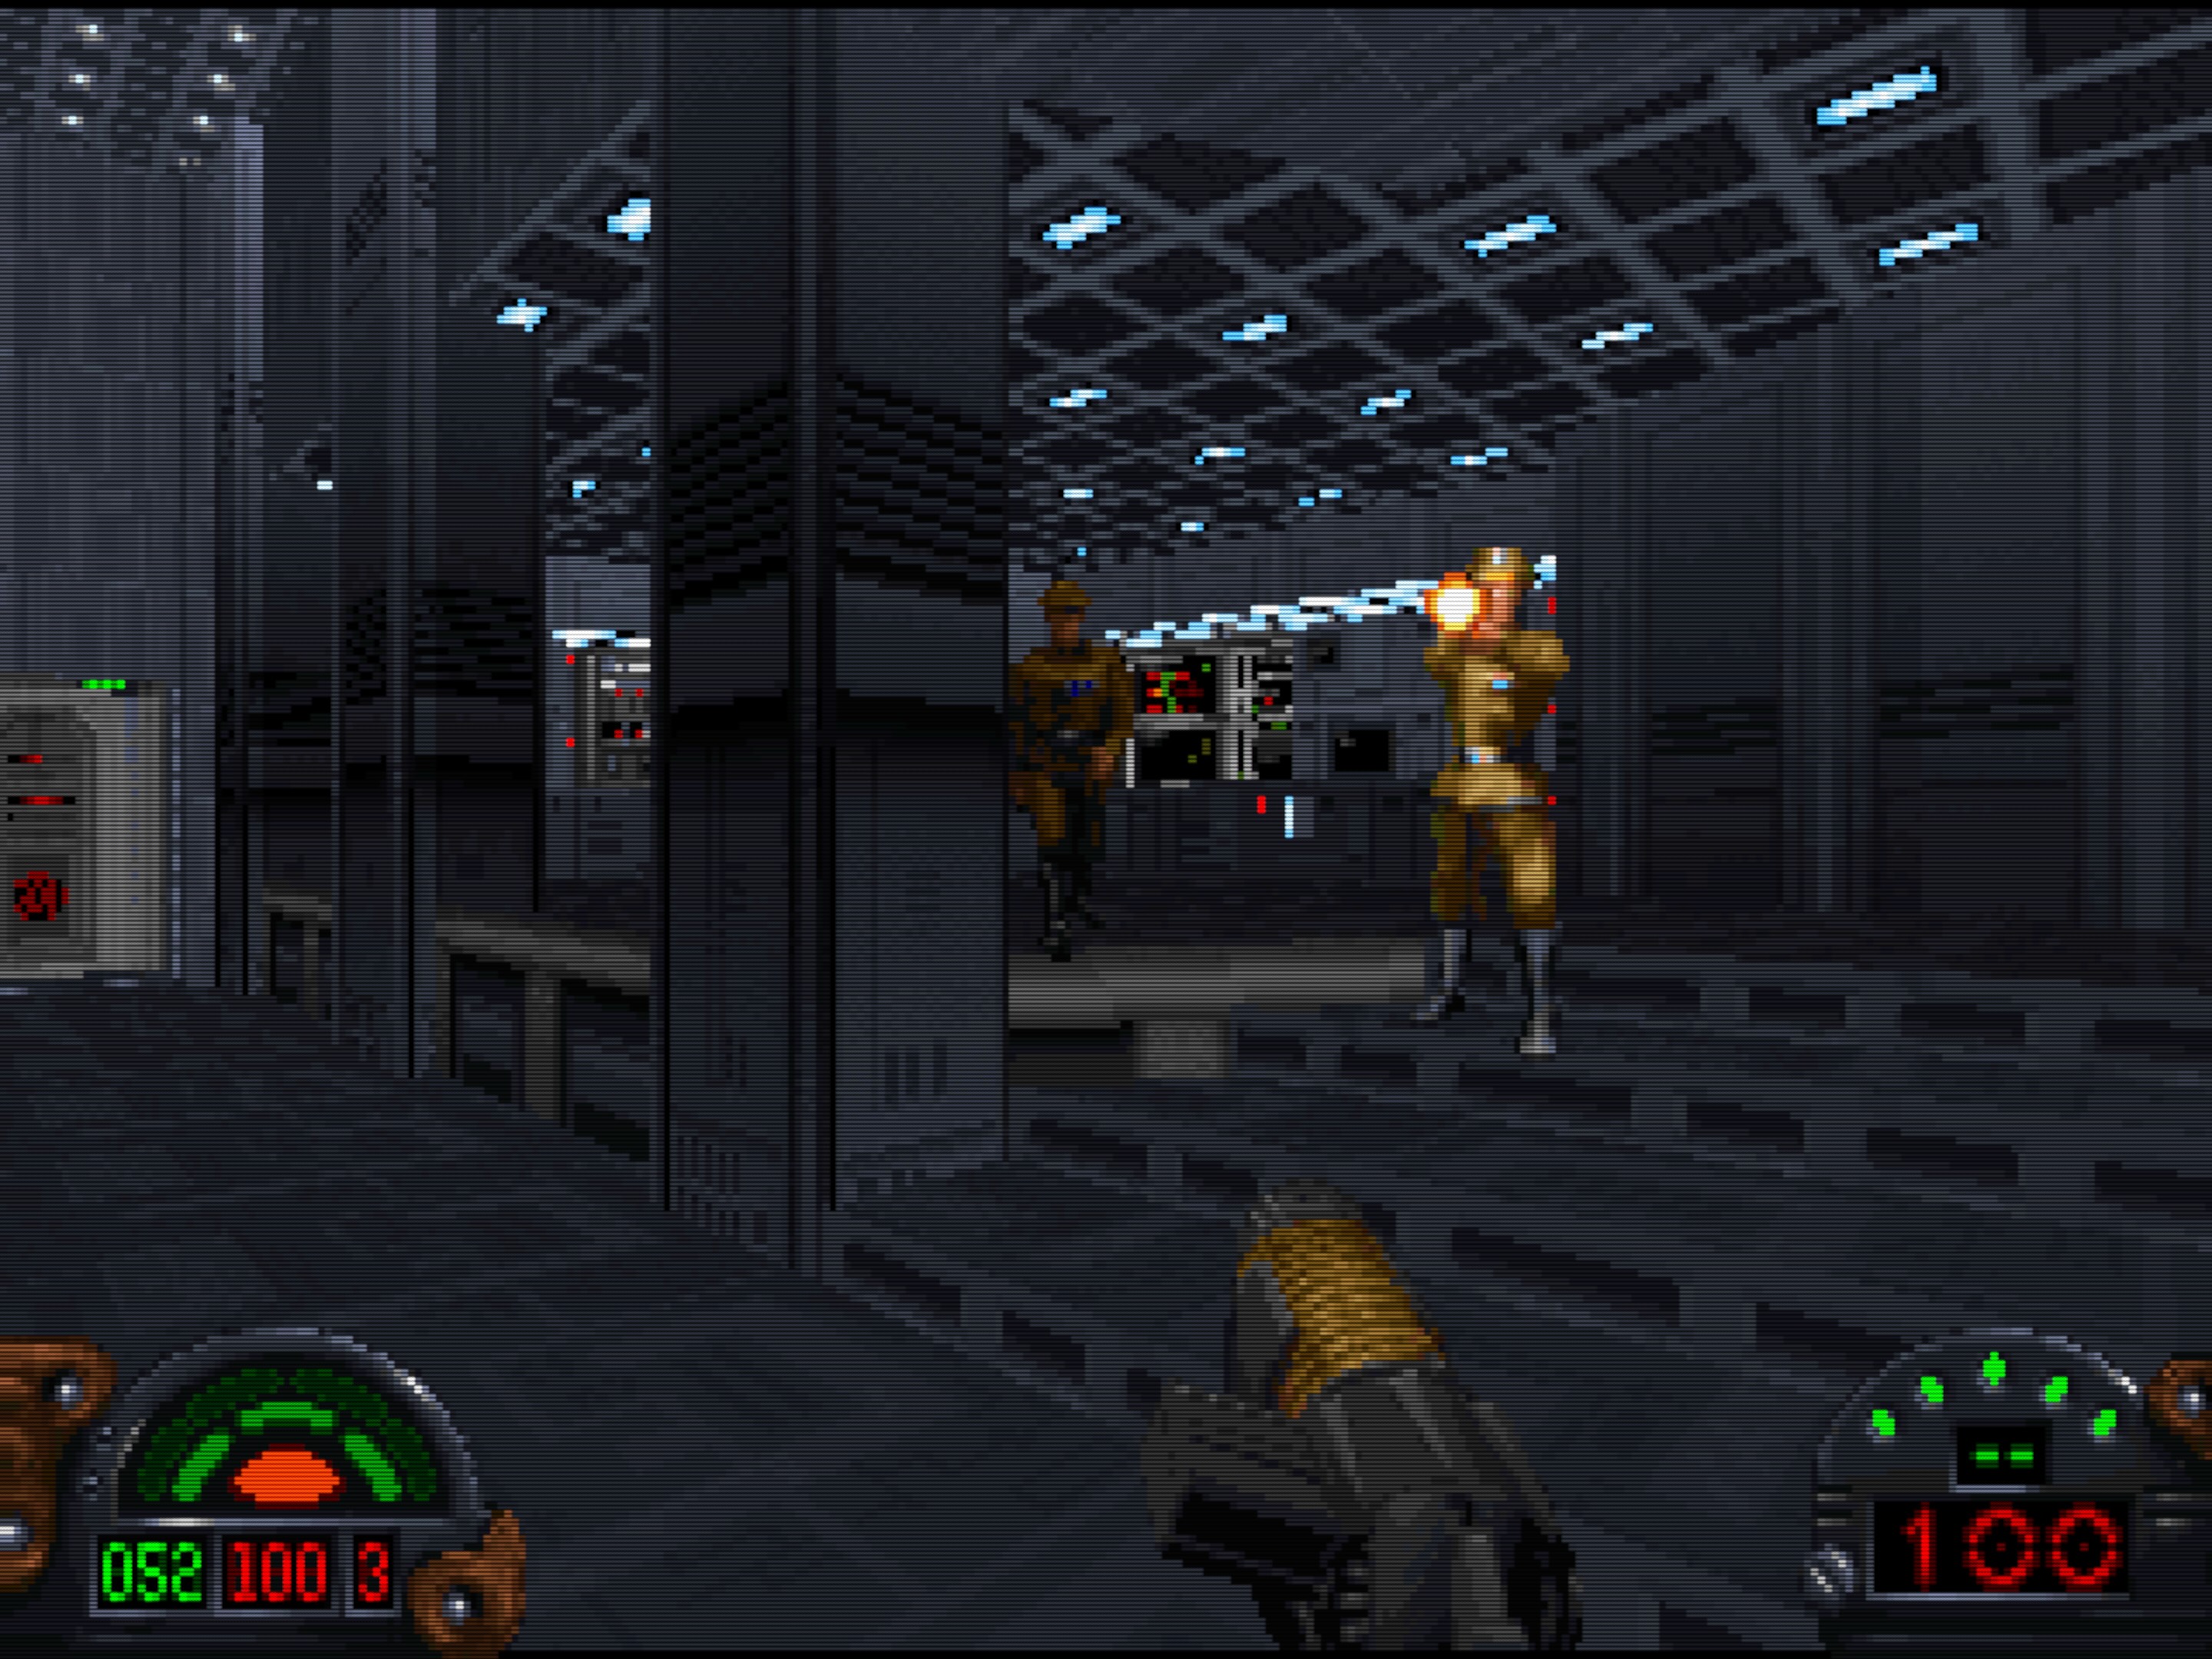
Star Wars: Dark Forces — Opening scene
Autotype
Having to press the 1 key every time we start the game is not the end of
the world, but it’s not great either. Luckily, there’s a way to automate
that; the handy autotype DOSBox Staging command does exactly what it says on
the tin — it can “auto-type” fake keypresses for you!
This is what we need to put into our [autoexec] section to start the game
without manual intervention:
The first -w 0.5 argument of the autotype command specifies an initial
half-second wait time before the “auto-typing” begins. This is followed by the
1 argument, which will auto-type the 1 key.
That’s it! It’s a simple but very useful feature. Run autotype /? to see the
full list of available options and check out the list of AUTOTYPE
candidates
on our wiki for assorted real-life examples.
Display refresh rate
Dark Forces uses the 320×200 256-colour VGA screen mode, just like the majority of DOS games from the 1990s. This mode uses a fixed 70 Hz screen refresh rate, so if your emulated CPU is fast enough, you can get 70 FPS out of the game.
But there’s a problem: most modern non-variable refresh rate flat screens work at a fixed 60 Hz rate. Luckily, DOSBox Staging intelligently times and drops frames if there’s a mismatch between the refresh rate of the emulated graphics card and the actual refresh rate of your physical monitor. In most cases, this works fine out of the box without you needing to configure anything.
However, even though DOSBox Staging is trying to do its best in such situations, mismatching emulated and host refresh rates will always result in some visible unevenness of motion. This is especially noticeable in games that feature smooth scrolling (e.g., platformers, shoot’em ups, and pinball games), and also in fast-paced 3D games, such as Dark Forces.
To achieve the smoothest possible motion, we have two options:
-
Using a variable-refresh rate (VRR) monitor — Nvidia G-Sync, AMD FreeSync, VESA AdaptiveSync, and Apple ProMotion certified displays all fall into this category. Any monitor that can continuously vary the refresh rate from about 59 to 72 Hz should do the job. DOSBox Staging automatically takes advantage of such displays by default; you don’t need to configure anything!
-
Using specific fixed refresh rates on non-VRR monitors — Even if you’re not a lucky owner of a VRR display, your monitor might support a fixed 70 Hz refresh rate if you create a custom screen mode for it. This is highly hardware-dependent, but there’s no harm in trying it out — it will either work or not; you can’t damage your monitor.
Note, however, that depending on the type of game, the 60/70 Hz mismatch might not matter much or at all. For instance, most adventure, strategy, and role-playing games rarely have fast-paced graphics; they generally only update the screen in the low 5-20 FPS range. Running the monitor at 70 Hz results in very little noticeable improvement with these games.
Another important consideration is that most pre-VGA games don’t feature smooth movement in their graphics, so the general unevenness of motion masks the slight judder resulting from the 60/70 Hz mismatch.
These are the refresh rates of the graphics standards emulated by DOSBox Staging:
| Graphics standard | Refresh rate |
|---|---|
| SVGA and VESA | 70 Hz or higher — 640×480 or higher extended and VESA modes |
| VGA | 60 Hz — 640×480 standard mode only 70 Hz — all other standard modes |
| CGA, PCjr, Tandy, EGA | 60 Hz |
| Hercules | 50 Hz |
See Presentation modes in the manual for the full reference on refresh rates and vsync.
Creating custom 60 and 70 Hz screen modes
“Custom resolution” is a bit of a misnomer because what we’re after is creating a new screen mode that uses your monitor’s native resolution but with a custom refresh rate.
You can create such custom resolutions using the Nvidia Control Panel or with the Custom Resolution Utility (CRU) on Windows. You’ll probably need to enable CVT reduced blanking (CVT-RB or CVT-RBv2) to be able to go up to 70 Hz. For the best results, it’s recommended to use the exact fractional 59.713 Hz and 70.086 Hz refresh rates for the nominal “60 Hz” and “70 Hz” DOS rates, respectively.
The drawback of this approach is that you need to set the appropriate custom resolution before starting DOSBox Staging, and if a game switches between different refresh rates, well, you’re out of luck. These games can only work 100% correctly on a true VRR display or a real old-school CRT monitor. However, most games only use a single fixed refresh rate, which is usually the standard 70 Hz VGA rate, so this technique still has a lot of practical utility.
Vertical syncing
Dark Forces always synchronises its screen updates to the refresh rate of the emulated VGA card, which is 70 Hz in the standard 320×200 VGA mode the game uses. Vertical syncing is hardcoded in the game — it cannot be turned off, and that’s the end of it.
But that’s only vsync at the level of the emulated VGA card. DOSBox itself must also present the emulated frames output by the emulated VGA card to the host operating system you’re running DOSBox Staging on, and it must do that vsync’ed, otherwise we’d still get tearing in fast-paced games like Dark Forces.
DOSBox Staging tries its best to automatically detect the conditions where enabling vertical syncing at the DOSBox level is beneficial. You will rarely need to override the out-of-the-box vsync setting to get the best experience on your setup.
Note
For example, the compositor of most modern operating systems displays the content in windowed mode vsynced, so we’re getting vsync “for free”, and additional DOSBox-level vsync would only do harm; on VRR/adaptive sync monitors its best to present the frames non-vsynced and let the monitor adapt, etc. By default, DOSBox Staging auto-detects all such conditions and auto-configures up the vsync and frame pacing settings accordingly.
What complicates matters is that not all DOS games do vertical syncing. Games
that don’t would tear on real hardware, too, and DOSBox can’t do anything about
that — it just accurately emulates how the game behaves. Without DOSBox-level
vsync, you’d get double tearing in such games! We can’t “fix” that at the
emulator level; that would require making changes to the games’ code. Many
pre-rendered cutscenes and FMV games tear really badly on real hardware, too,
on CRTs — that’s the “authentic DOS experience” for you! 
But, as mentioned previously, the good news is that games that don’t do vsync are usually slower-paced adventure, strategy, and role-playing titles that only do about 5-20 FPS anyway, and most of the screen is static. So, a little bit of tearing is barely noticeable in these games.
Two-stage vsync
It is crucial to understand that tearing can be introduced at two levels (!) because we’re running the game in an emulator:
-
The game itself might not care about vsync, so it would tear on real hardware too (and DOSBox would faithfully emulate this).
-
DOSBox Staging might not present the emulated frames to the host operating system vsync’ed, which could result in a second layer of tearing, solely introduced by the emulator.
To get zero tearing in a game, both conditions must be met:
-
The game must be coded in a way to have zero tearing on real hardware (in other words, the game itself must be vsyncing its video output to the VGA hardware).
-
Vertical syncing at the DOSBox Staging level must also be enabled (so DOSBox must present the emulated frames to the host operating system vsynced).
Of course, this is in addition to matching the exact refresh rate of the game, as explained in the previous section. Displaying 70 Hz content on a 60 Hz monitor with vsync enabled would still require frame drops, which causes jerky scrolling and movement in games that feature smooth scrolling.
Again, you have absolutely no control over the vertical syncing behaviour in most DOS games. For example, Commander Keen 4–6, Doom, and many other FPS games have hardcoded vsync with a fixed 35 FPS cap. These games were programmed with fixed refresh rates in mind from the ground up; trying to disable the vsync or altering the FPS cap would break them (but the good news is, you can’t do that anyway).
To recap, the following variations are possible when it comes to vsync:
| Game uses vsync? | DOSBox-level vsync enabled? | Result |
|---|---|---|
 yes yes |
yes |
No tearing |
 no no |
yes |
 Some tearing (also present on real hardware) Some tearing (also present on real hardware) |
| yes |
no |
 Bad tearing (in fast-paced games) Bad tearing (in fast-paced games) |
| no |
no |
 Very bad double tearing (in fast-paced games) Very bad double tearing (in fast-paced games) |
This will void your warranty, pal
Make sure you do not force vsync globally at the GPU driver level (e.g., in Nvidia Control Panel or similar). If you do that, it’s almost certain you will get all sorts of weird behaviour in DOSBox Staging. It’s highly recommended to leave the global vsync settings at their defaults (“let the application decide”) and only tweak vsync on a per application basis.
Various frame limiter utilities have similar effects — make sure they’re not running when you use DOSBox Staging, or whitelist individual games to be frame limited instead of letting them throttle every program globally.
By the way, forcing vsync globally would wreak havoc not just on DOSBox Staging, but pretty much every single home computer and console emulator — that’s just how they work. In contrast to modern 3D games, they need full control over frame pacing and vsync without any external “help”.
Here be dragons
Manually configuring vsync is an advanced topic for power users only, so
it’s beyond the scope of this beginner’s guide. If you’re feeling brave,
look into the presentation_mode, vsync, vsync_skip, host_rate, and
dos_rate settings for further details, but it’s unlikely you’ll be able
to improve the automatically chosen settings unless you really know what
you’re doing. It’s super easy to make the situation a lot worse by
misconfiguring things, so when in doubt, just reset these settings to
their “factory defaults”.
Setting the emulated CPU speed
Hardware-accelerated 3D graphics only became widespread in the late 1990s after the end of the DOS era, so most DOS games only use software rendering. Dark Forces is no exception, which means your emulated CPU needs to be fast enough to reach the 70 FPS maximum the game supports.
The game prints out the familiar message of the DOS/4GW DOS extender at startup, which means this is a protected mode game:
As we’ve learnt, protected mode games default to 60 000 cycles, which is roughly equal to the performance of a Pentium 90 MHz processor. As it turns out, the game runs perfectly with this setting and is able to achieve a stable 70 FPS (if your computer is powerful enough). We could conclude that we don’t need to mess with the CPU settings, but let’s do a quick experiment before moving on!
As mentioned before, emulating a “too powerful” CPU can starve the audio emulation, leading to audible glitches, clicks, and pops. To avoid such issues, it’s much preferable to emulate a CPU that is just powerful enough to handle 70 FPS but not more powerful.
One way to come up with a good cycles number is to start the game with a relatively low cycles setting, say 10 000, then keep increasing it with the Ctrl+F12 shortcut (Cmd+F12 on the Mac) while playing to arrive at the lowest value that results in adequate performance. As a reminder, you can decrease the current cycles value, too, with the Ctrl+F11 (Cmd+F11) shortcut.
So, let’s add the following to our config:
Start the game and hold the Left or Right key to keep turning around, then increase the cycles value until the motion becomes smooth (again, unless you’re using a VRR monitor or a fixed 70 Hz refresh rate, it will never become completely smooth). Somewhere around 50 000 cycles seems to do the trick, which roughly corresponds to a Pentium 90 based on our table of common CPU speeds. We could set that value in our config, or just leave the default value of 60 000 as it seems to do the job fine. We might need to increase the cycles value if later levels are more demanding on the CPU, but this is a good starting point for now.
Running out of steam
As you keep increasing the fixed cycles value, the audio will start breaking up, and the motion will become very stuttering after a certain point. This means you’re trying to emulate a faster CPU than your computer can handle. If you’re on a less powerful machine, this, unfortunately can happen before reaching the minimum cycles value necessary for achieving a smooth and stable 70 FPS rate.
You have the following options in that situation:
- live with a lower cycles setting that results in less than 70 FPS,
- buy a more powerful computer with a faster processor,
- or set
cpu_cycles_protected = 60000andcpu_throttle = onin your config.
cpu_throttle = on will dynamically lower the current cycles value to the
maximum your host CPU can handle at any given point in time if it cannot
keep up with the configured value (60 000 in our case). Many games
work fine with such “fluctuating” emulated CPU speeds, but some will freak
out and start misbehaving. In any case, it’s worth a try.
Also, make sure you’re not running any other CPU-intensive programs in the background while using DOSBox Staging. Virus scanners, backup software, copying large files to USB storage, heavy network traffic, and even ordinary web browsers with many tabs open can chew up a significant chunk of your total CPU power or cause audio micro-stutters. Certain popular chat programs can be very demanding on the CPU, too, and, surprisingly, even innocent-looking stuff such as automatic wallpaper switchers can have negative effects on the performance of DOSBox.
As a general rule, it’s best to close all other programs if you’re encountering performance issues with DOSBox Staging and try again. Just apply common sense and treat DOSBox as any other performance-intensive modern game. This might seem counterintuitive as we’re running decades-old software here, but emulation can be very demanding on your computer.
Setting up General MIDI sound
Our previous example game, Beneath A Steel Sky, supports the Roland MT-32 MIDI sound module to provide more realistic-sounding music than what the Sound Blaster’s OPL synthesiser is capable of. Dark Forces, however, was composed for a newer family of MIDI sound modules that support the so-called General MIDI standard. By the time Dark Forces was released in 1995, General MIDI had largely replaced the MT-32 as the standard for high-end game music. To learn more about the history and differences between these standards, see the MIDI chapter.
DOSBox Staging offers two ways to get General MIDI playback:
-
Sound Canvas emulation — sample-accurate emulation of the Roland SC-55, the de facto standard General MIDI sound module for DOS games. This is the most authentic option but requires SC-55 ROM files and a reasonably powerful CPU.
-
FluidSynth — a built-in software MIDI synthesiser that uses SoundFont files (
.sf2) to generate audio. Lighter on CPU and more flexible, but the results depend on which SoundFont you load.
Sound Canvas emulation
DOSBox Staging can emulate the Roland Sound Canvas SC-55 directly, providing sample-accurate playback of the actual SC-55 sound engine — as close to the real hardware as you can get without owning one.
Roland went a bit beyond the General MIDI standard in their Sound Canvas series; these modules actually support the General Standard (also referred to as Roland GS, or just GS), which is basically General MIDI plus a few Roland-specific enhancements. Many games take advantage of these extra features.
Just like the MT-32, Sound Canvas emulation requires ROM dumps of the original
hardware. Start by downloading the ROM files from
here, unpack the
ZIP archive, then move the contents of the Nuked-SC55-Resources/ROMs/ folder
into the DOSBox Staging soundcanvas-roms folder:
| Windows | C:\Users\%USERNAME%\AppData\Local\DOSBox\soundcanvas-roms\ |
| macOS | ~/Library/Preferences/DOSBox/soundcanvas-roms/ |
| Linux | ~/.config/dosbox/soundcanvas-roms/ |
This is what the contents of soundcanvas-roms should look like:
soundcanvas-roms
├── SC-55-v1.10
│   ├── sc55_rom1.bin
│   ├── sc55_rom2.bin
│   ├── sc55_waverom1.bin
│   ├── sc55_waverom2.bin
│   └── sc55_waverom3.bin
├── SC-55-v1.20
│   ...
├── SC-55-v1.21
...
Now start up DOSBox Staging and verify that the Sound Canvas plugin is
functional by running MIXER /LISTMIDI. The Sound Canvas section should look
like this:

DOSBox Staging will prefer the SC-55 v1.21 firmware when available, which is the best overall choice for DOS gaming.
To enable Sound Canvas emulation, add the following to your config:
Re-run MIXER /LISTMIDI to confirm the Sound Canvas is now active:

Now let’s reconfigure the game to use General MIDI for music. Comment out the
autotype command in the [autoexec] section and restart DOSBox, then:
-
Press 3 in the startup menu to reconfigure the sound settings, then C to do a custom setup.
-
Enter the Advanced Menu (it’s above Quit at the bottom).
-
Select the General MIDI device for Music and the default
330value for the Port setting. -
You don’t need to change the Digital Sound settings as our Sound Blaster 16 has been auto-detected correctly.
The final configuration should look like this:
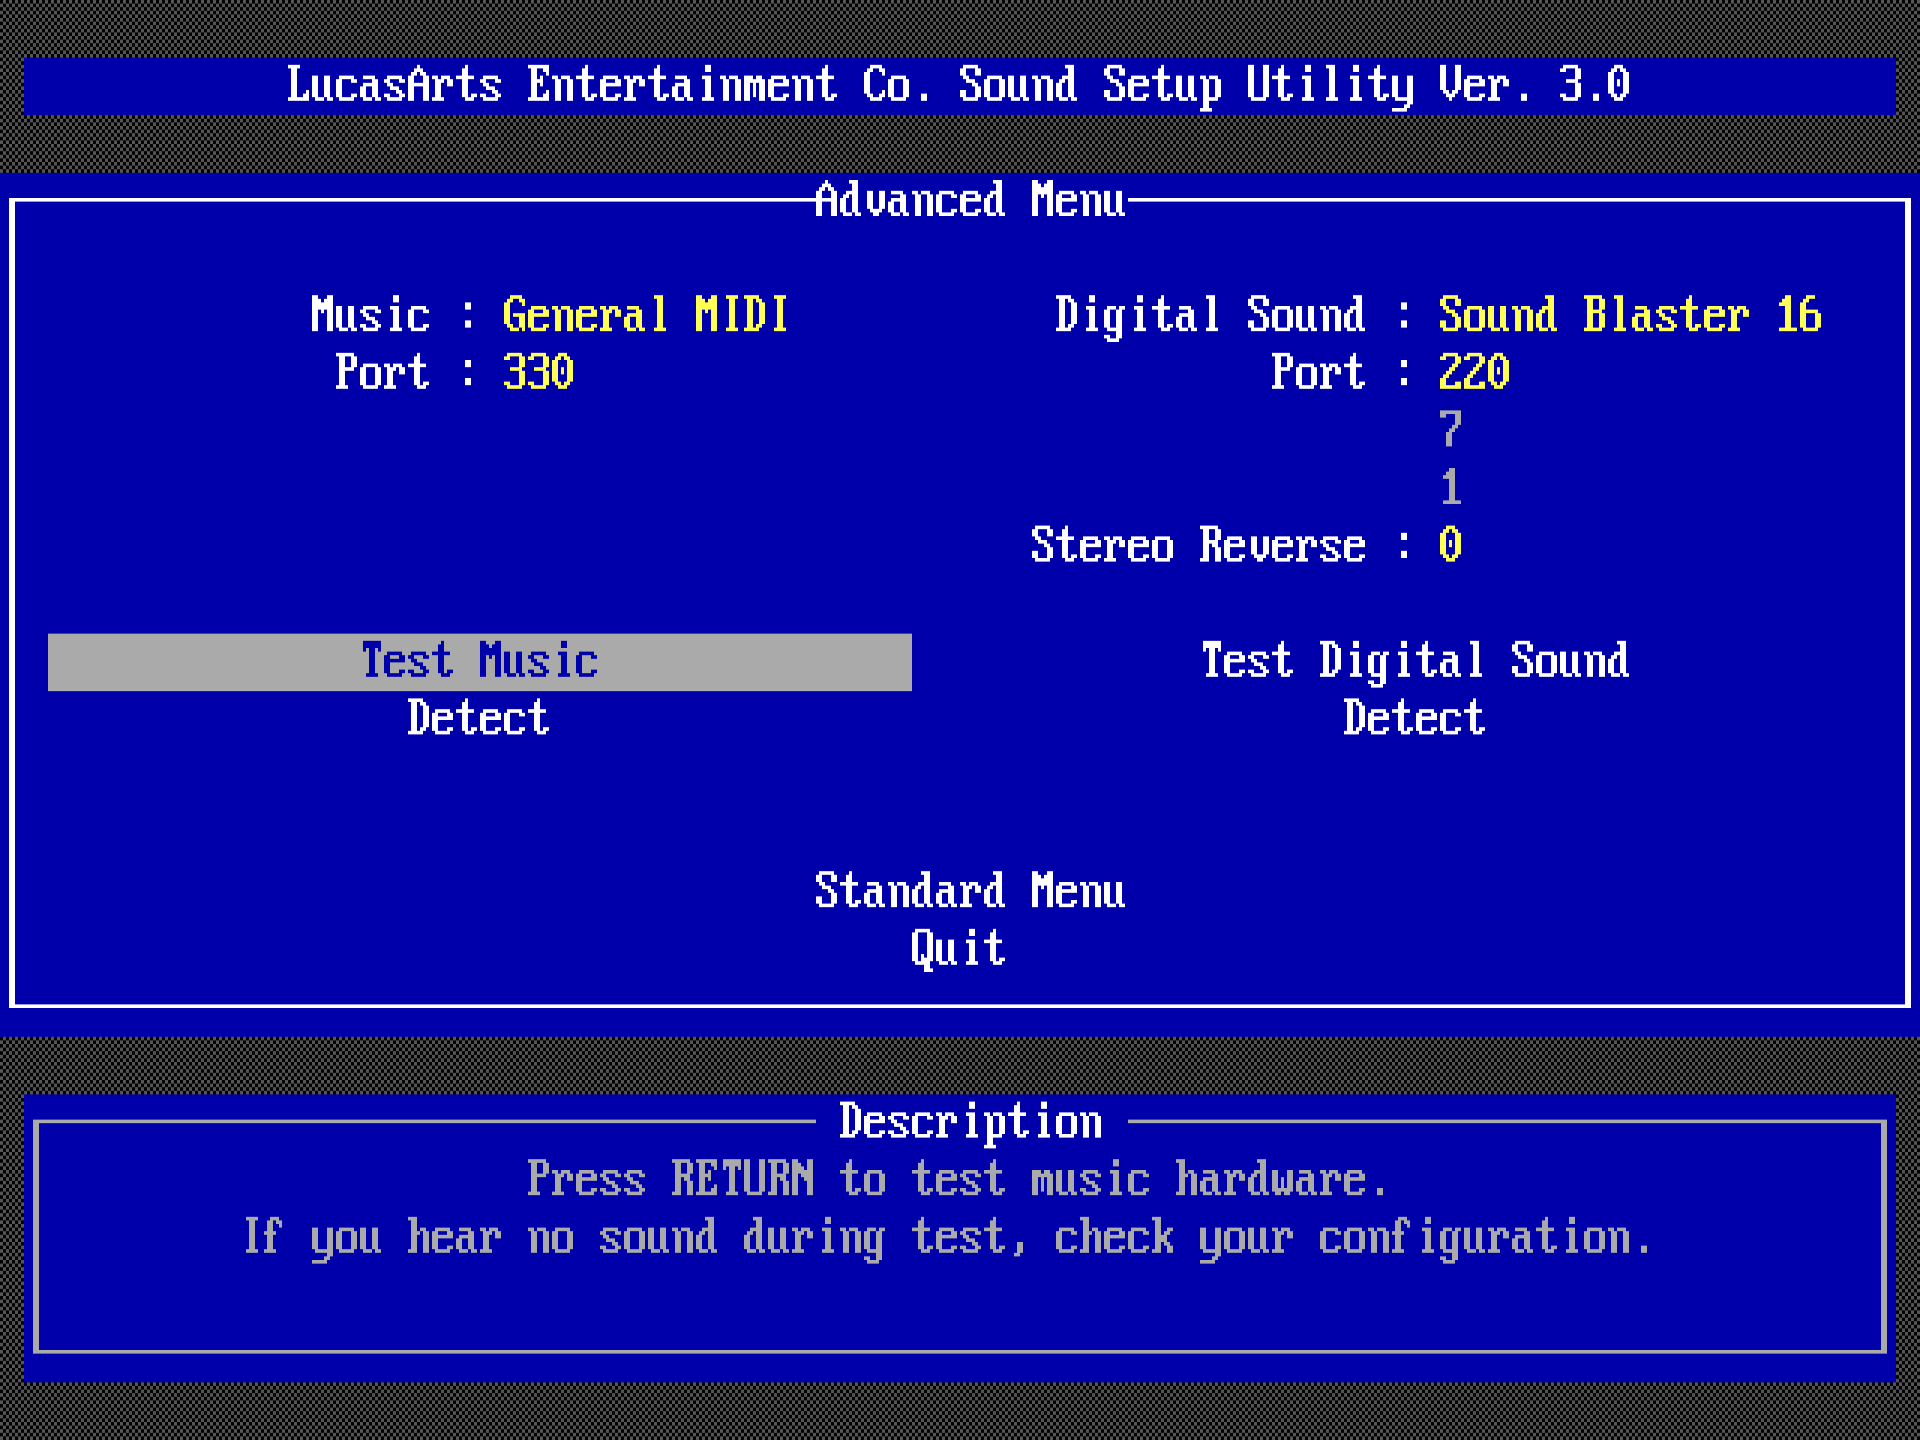
Press Enter on the Test Music menu item and you should hear the start of the Imperial March playing with much more realistic instruments!
How to drive a manual
Note that if you try to use Detect in the Music section, the auto-detection will fail, and the Music option will revert to None. This can happen with some setup utilities, therefore it’s important to know that the port of the General MIDI device must be set to 330, should the auto-detection fail. This is sometimes called the MPU-401 port, MPU port, or just MIDI port.
Similarly, most games can auto-detect the Sound Blaster settings, but sometimes you need to enter them manually. The default DOSBox settings are port (I/O address) 220, IRQ (interrupt) 7, and DMA channel 1.
It’s worth watching the whole intro at this point to appreciate how much more realistic the General MIDI rendition of this orchestral piece sounds compared to the OPL synth.
Note
Sound Canvas emulation is CPU-intensive. You’ll need a mid-range or better desktop-class CPU from the last 5–7 years for glitch-free playback. If your system struggles, FluidSynth with a good SoundFont is a lighter alternative that still sounds great.
FluidSynth
Unlike the MT-32 or Sound Canvas emulation, FluidSynth does not attempt to
mimic any specific hardware device but a generic MIDI sound module. This sound
module doesn’t have any built-in sounds — you need to load so-called
SoundFont files (.sf2 extension) into FluidSynth to get any sound out
of it; these contain the instrument definitions and the sound data. Since many
DOS games use Roland GS extensions, it’s recommended to use GS-compatible
SoundFonts for the best results.
One such SoundFont is GeneralUser GS. Download the latest
version (v2.0.1 at the time of writing this), unzip the package, then copy the
SoundFont file with the .sf2 extension into its designated folder:
| Windows | C:\Users\%USERNAME%\AppData\Local\DOSBox\soundfonts\ |
| macOS | ~/Library/Preferences/DOSBox/soundfonts/ |
| Linux | ~/.config/dosbox/soundfonts/ |
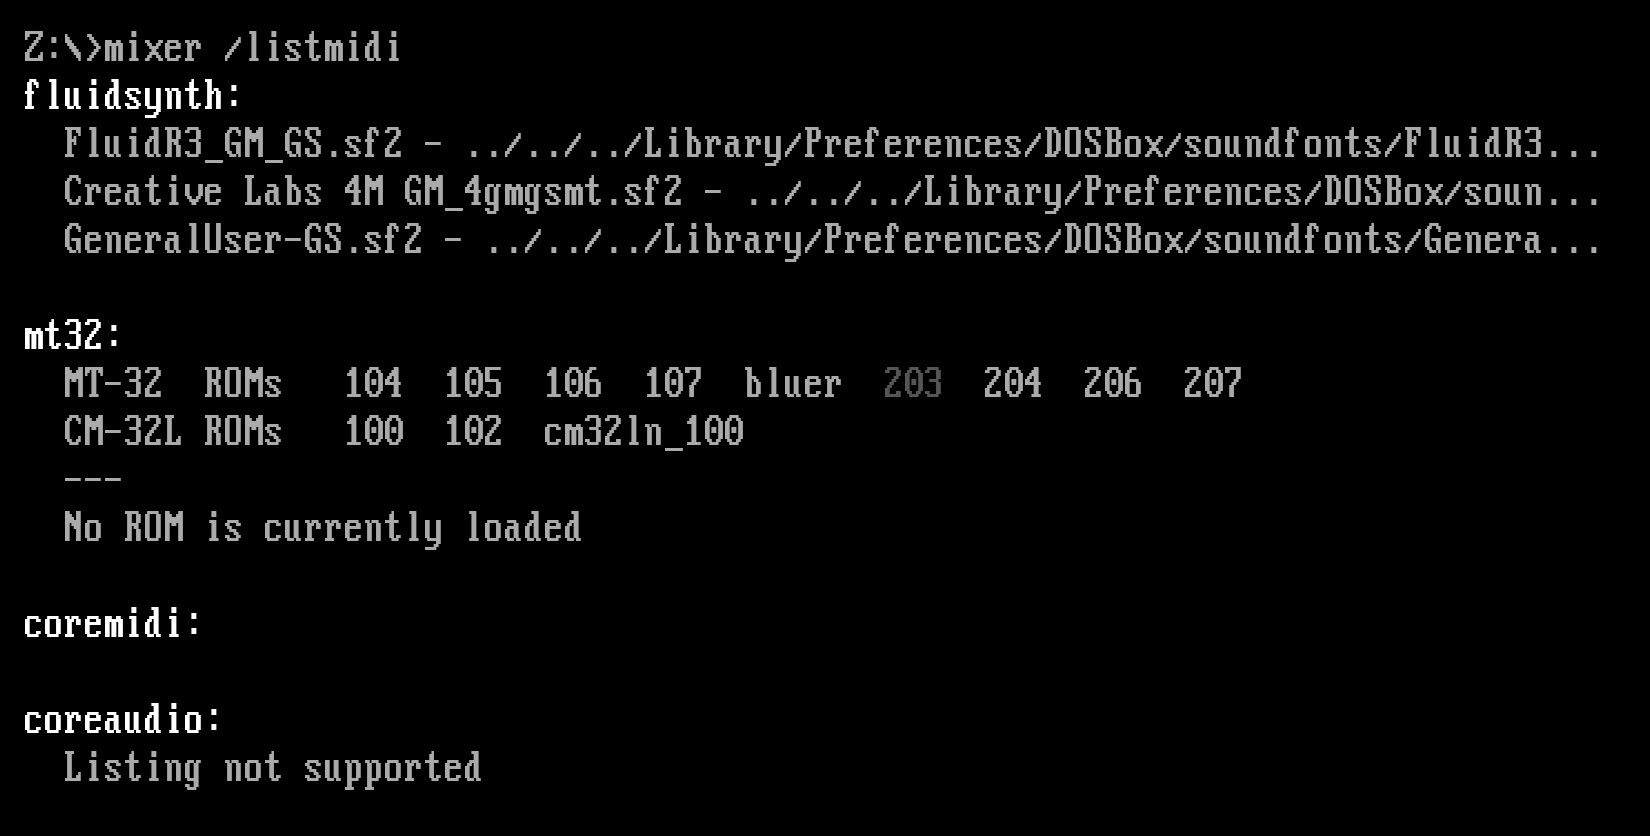
You can use the mixer /listmidi command to get the list of available
SoundFonts. If you’ve copied the SF2 file into the correct folder, you
should see the following:
To configure FluidSynth, add the following to your config. The name of the
SoundFont might be slightly different if a new version has been released since
the writing of this guide, so make sure you use the correct filename for the
soundfont setting. You can omit the .sf2 extension from the name.
The game configuration is the same as described in the previous section —
select General MIDI on port 330 in the sound setup utility.
Of course, you can always try other GM or GS-compatible SoundFonts too — that’s the beauty of General MIDI! FluidR3_GM_GS and Creative Labs 4M GM_4gmgsmt are good candidates as they sound fairly close to the SC-55 sound set. The list of recommended SoundFonts on our wiki should also give you some further pointers on which SoundFonts are worth trying and where to find them.
Note that while some SoundFonts, such as GeneralUser GS, give you overall good results in most games, other SoundFonts might excel in a handful of titles and sound terrible in others. To give you an idea, here’s how the intro music sounds on the original Roland SC-55 hardware versus a few different SoundFonts. As mentioned, GeneralUser GS and Creative 4GMGSMT are the closest in terms of overall balance and character, the rest are rather hit-and-miss. My advice: just pick one that gives you good overall results and stick with it. It’s best to do this in your primary config; then, you never need to think about it again.
Further comparison recordings can be found on our wiki.
| Roland SC-55 v1.21 (hardware) | |
| GeneralUser GS | |
| Creative 4GMGSMT | |
| FluidR3_GM_GS | |
| FatBoy | |
| Arachno |
Turn it down, please!
Some SoundFonts are way too loud; if you encounter such a SoundFont, you’ll most likely want to lower its output level. The best way to do so is by including an additional percentage volume value after the SoundFont’s name in the config, e.g.:
This will scale back the volume to 40%. A few SoundFonts are extremely loud — you need to turn the volume down to 10-20% to get usable levels. It’s a mystery what the authors were thinking…
Roland MT-32 is not General MIDI
Do not confuse the Roland MT-32 family of MIDI sound modules with General MIDI modules! Music composed for the MT-32 often sounds utterly wrong on a General MIDI device, and vice versa. Yes, they both have “MIDI” in their names, but that only refers to the MIDI communication protocol. The MT-32 range of devices are programmable synthesisers, and most MT-32 supporting games take advantage of that to create custom sounds. In contrast, General MIDI modules are generally weaker in the synthesis department but feature more realistic-sounding real-world instruments with a less malleable sound. The soundtrack of Dark Forces showcases this very well — you can’t get such realistic orchestral music out of an MT-32.
Whenever you configure a game for MIDI sound, you should consult the List of MT-32-compatible computer games first. This contains the hard-earned knowledge of many decades of research and tells you which MIDI module to use for a particular game. The original game manuals very rarely give you this info, and even if they do, the information is often wrong. So you absolutely need this list to get the best MIDI music out of a game.
Quite confusingly, there’s a large list of games that claim MT-32 compatibility but only sound correct on a General MIDI module. Make sure to check the List of games that falsely claim MT-32 compatibility as well before configuring a game for MT-32 sound.
A brief history of MIDI in DOS gaming
The iconic Roland MT-32 released, in 1987, was the first sound module that made realistic-sounding music in DOS games a possibility. In 1991, Roland released its successor, the iconic Roland Sound Canvas SC-55.
The SC-55 shaped DOS gaming history in significant ways: it was the world’s first device to support the General MIDI standard. MIDI only defines a communication mechanism between MIDI-capable devices (e.g., a sound module and your computer). But it remains silent on how the different instruments should sound. General MIDI (GM) remedied this with its 128 standard instrument definitions. For example, on any GM-compliant module, instrument #1 is always the Acoustic Grand Piano and instrument #36 is the Fretless Bass.
This made interoperation between GM-compliant devices possible. You could use any General MIDI sound module with any GM-compliant game, and you would get music. The music would sound mostly correct, but this depends on the musical composition and the particular sound module. Most composers and gamers had the SC-55, establishing it as a de facto standard. This means music could sound unbalanced and weird on other GM sound modules if they deviated too much from the “gold standard” SC-55 sound.
Additionally, the SC-55 also supports the General Standard (Roland GS, or only GS in short), which is Roland’s vendor-specific General MIDI extension. Many games make good use of these extra features and sound wrong in their absence. This means that alternative MIDI modules need to support both the GM and the GS standards to sound correct with DOS games.
The Yamaha DB50XG and MU-series (e.g., MU50, MU80, MU100, etc.) are such MIDI modules. They can be viewed as more modern-sounding and higher-quality takes on the original SC-55. They offer excellent SC-55 compatibility but with a more polished and punchy sonic character. In fact, many prefer them to the SC-55 in certain DOS games. If you are curious about how these Yamaha modules stack up against the SC-55, this article might be of interest.
Dynamic range compression
See the DOSBox mixer page for the full mixer reference and Mixer effects for reverb, chorus, and crossfeed.
If a game has loud music and you set the output level of your soundcard too high, you’ll get rather unpleasant-sounding distortion and crackling on real hardware. DOSBox Staging has a dynamic range compressor on the master channel that automatically pulls the volume back on loud sounds to prevent such distortions.
You can test this by playing the game for a minute with the GeneralUser GS SoundFont. You might notice a slight “pumping” as the compressor pulls the volume back on loud sound effects; this dips the volume level of the background music as well.
To hear the distortion caused by the loud sounds clearly, disable the master compressor:
Overall, the compressor does a good job of preventing audible distortion up to
a certain point, and most users should not think much about it; it just works.
But if the master channel is overdriven heavily, the pumping artifacts would
be rather distracting, so in that case, it’s better to lower the master volume
with the mixer command (e.g., mixer master 50 to set the master volume to
50%). People who are after the best audio quality should also prefer lowering
the master volume rather than relying on the compressor.
The sound output of Dark Forces is on the loud side, so we’ll set the output to 50% to make sure the compressor is never engaged:
Reverse stereo
The sound setup utility asks us to confirm whether the left and right audio channels should be swapped when setting up digital audio. Weird as it may sound, some Sound Blaster models and clones had “reversed stereo” for some inexplicable reason. If people used any of these cards during the development of a game, the stereo image would be reversed on normal cards, and vice versa.
Irrespective of the exact reasons, the fact is that some games with stereo digital audio support have the left and right channels reversed. In affected games, the channels might be reversed on all Sound Blaster variants, or only on certain models.
In the case of Dark Forces, you don’t need to use the “reverse stereo” option
when emulating a Sound Blaster 16 card (which is the default). However, when
using the Sound Blaster Pro 1 model (sbtype = sbpro1), the stereo image
needs to be reversed.
But what about games that don’t have such a handy “reverse stereo” option in
their setup utility? For those games, you can simply reverse the left and
right channels of the SB mixer channel with the mixer sb reverse command.
This will only reverse the digital sound output of the Sound Blaster.
(Remember, you can use mixer /? or help mixer to view the mixer command’s
help.)
Minimising audio glitches
See also Minimising audio glitches in the manual.
Even after setting the optimal cycles value for a game to limit the emulated CPU speed, you might still hear occasional audio glitches. This can happen depending on a lot of factors, but it mainly comes down to the particular hardware, driver, and operating system combination you’re using.
As a last resort, you can try setting larger audio buffer sizes; this usually helps eliminate the occasional clicks and pops. The downside of this is that it will also increase audio latency, meaning that you’ll hear the audio in response to some action with a longer delay (e.g., when shooting with a gun).
The default blocksize value is 1024 on Windows and 512 on macOS and Linux
(specified in number of audio frames). The default prebuffer size is
25 on Windows and 20 on the other platforms (specified in
milliseconds). You can experiment with increasing these settings — doubling
them is a good start. Generally, prebuffer can be anything and blocksize
should be set to one of these values: 256, 512, 1024, 2048, 4096, or 8192.
Final configuration
Here’s the full config of Dark Forces set up for General MIDI sound:
[sdl]
fullscreen = on
[mixer]
compressor = off
[midi]
# use Sound Canvas for the most authentic SC-55 sound
mididevice = soundcanvas
# alternatively, use FluidSynth (lighter on CPU)
#mididevice = fluidsynth
[fluidsynth]
# not needed if you set this in the primary config
soundfont = GeneralUser-GS
[autoexec]
c:
mixer master 50
autotype -w 0.5 1
demo
exit